My Keyboard-Driven Mac Setup
Many Vim users go through a phase where the config becomes the hobby: a .vimrc that grows to hundreds of lines, copied from blog posts, forum answers and a colleague's dotfiles, held together by comments like " don't touch this, it breaks everything. Every new laptop means a weekend of reinstalling plugins and remembering why half of them are there.
My setup today is the opposite: almost embarrassingly small. I use Neovim, I start from NvChad, and my personal customisations fit on one screen. My editor is faster, prettier and more capable than it has ever been, and I spend my time writing code instead of maintaining a config.
The same idea runs through the whole desk: a tiling window manager driven by Vim keys, a fast terminal, a handful of excellent command-line tools, and an editor that's mostly someone else's (very good) work. Here's the whole thing, from the windows down to the keystrokes.
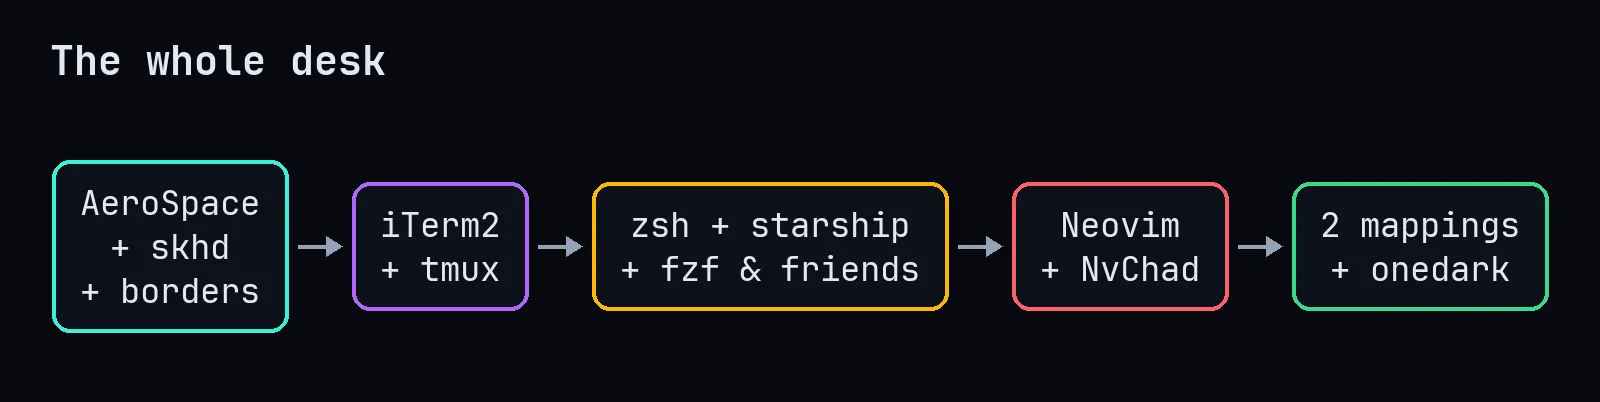
The windows: AeroSpace, skhd and borders
Before the editor, there's the desktop. macOS window management is, politely, a lot of dragging. I use AeroSpace, a tiling window manager inspired by i3: every window gets tiled automatically, nothing overlaps, and I move around with the keyboard.
The best part is that it speaks Vim. Focus and movement use h j k l, the same keys I use inside the editor, so moving between windows and moving inside a file feel like one skill:
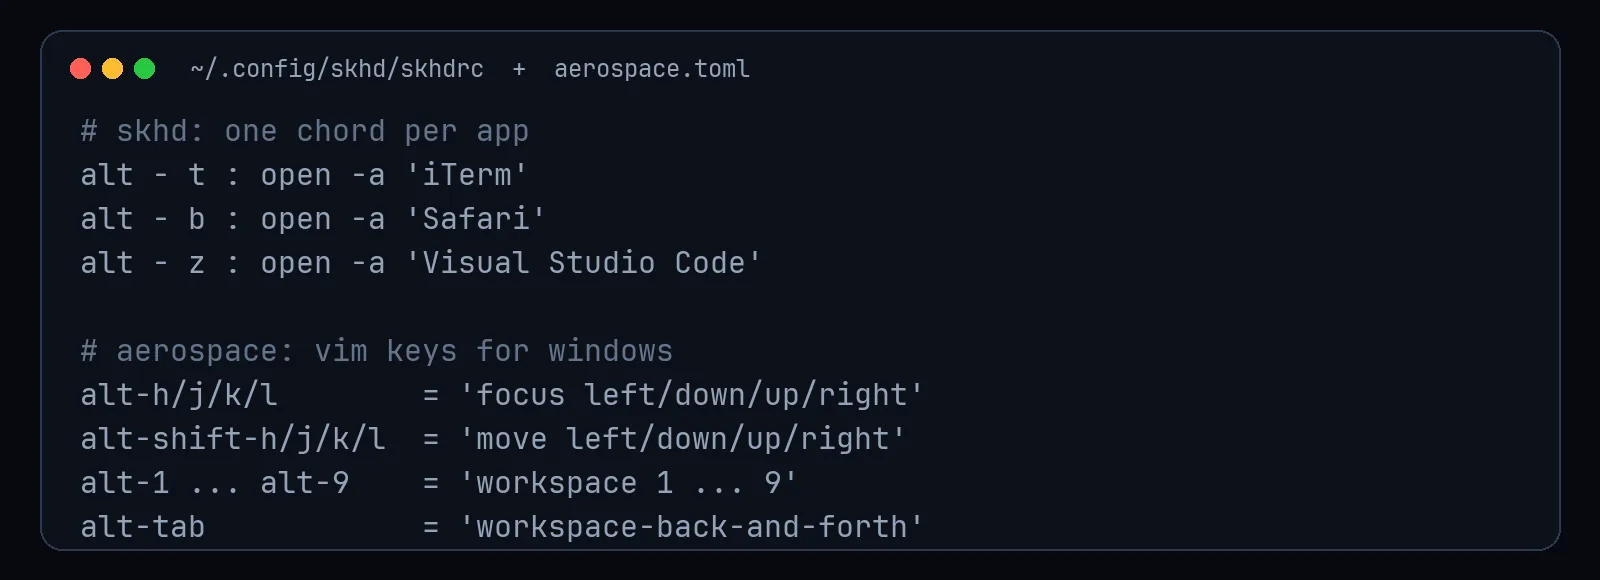
alt-h/j/k/lfocuses the window to the left, below, above or right, even across monitors.alt-shift-h/j/k/lmoves the window in that direction.alt-1toalt-9jump to workspaces; pressing the same number again flips back to where I was.alt-tabtoggles between the last two workspaces. Faster than Cmd-Tab, because it's spatial.alt-renters a resize mode;alt-0balances all window sizes.alt-spacetoggles a window between floating and tiled.
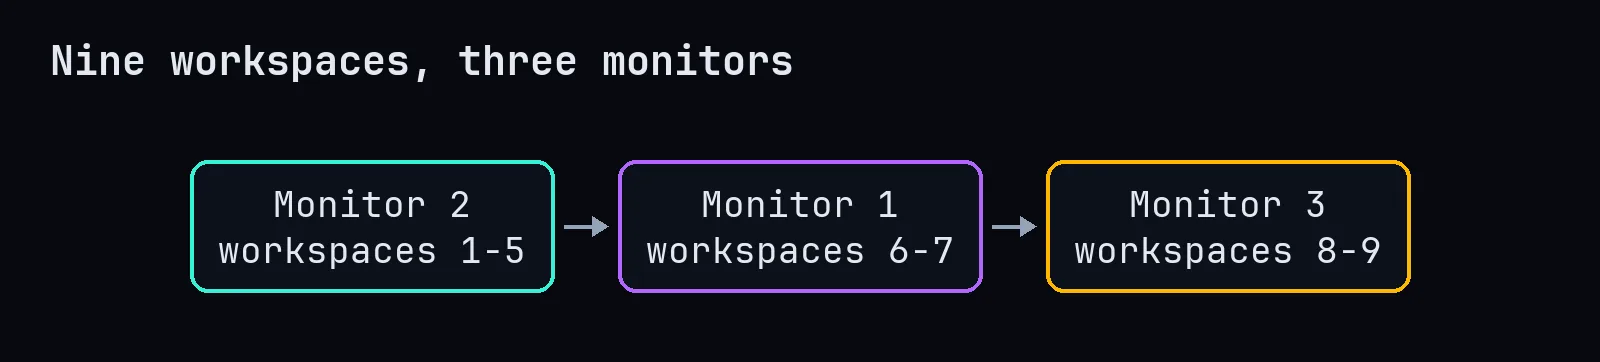
Workspaces are pinned to specific monitors, so things always live in the same place. Workspaces 1 to 5 belong to one screen, 6 and 7 to another, 8 and 9 to the third:
Some apps just shouldn't be tiled. Small utility windows like System Settings, Calculator, Activity Monitor, Passwords, Find My, Music and the VPN client open as floating windows automatically, using AeroSpace's on-window-detected rules. Gaps are tiny (2 px): I want the screen space, not the aesthetics.
skhd handles app launching. It's a simple hotkey daemon: one line per shortcut, and every app I use daily is one chord away. alt-t opens iTerm, alt-b Safari, alt-z VS Code, alt-m Mail, alt-c Calendar, and so on. Combined with AeroSpace, I almost never touch the Dock.
JankyBorders (borders) draws a coloured outline around windows: a red gradient around the focused window and blue around the rest. With several tiled windows on screen, it answers the question "where is my keyboard focus right now?" at a glance. AeroSpace starts it automatically at login.
# ~/.config/aerospace/aerospace.toml (excerpt)
after-startup-command = ['exec-and-forget borders']

[mode.main.binding]
alt-h = 'focus left'
alt-shift-h = 'move left'
alt-1 = 'workspace --auto-back-and-forth 1'
alt-shift-1 = 'move-node-to-workspace 1'
(The menu bar stays tidy thanks to Ice, which hides icons I don't need to see all the time.)
The terminal: iTerm2 and a Nerd Font
I'm on a Mac, and I live in iTerm2. Split panes, a decent search, profiles and hotkeys: it does everything I need and gets out of the way.
The one thing that matters for Neovim is the font. Modern Neovim setups show icons for file types, Git status and diagnostics, and those icons come from a Nerd Font, a programming font patched with thousands of extra glyphs. I use JetBrains Mono Nerd Font. Without a Nerd Font, you get little boxes and question marks where the icons should be, and you'll think your setup is broken.
brew install --cask font-jetbrains-mono-nerd-font
# then: iTerm2 → Settings → Profiles → Text → Font
The shell: zsh, starship and a few great tools
My shell is zsh with oh-my-zsh, kept to a sensible set of plugins: zsh-autosuggestions (grey suggestions from history as I type), zsh-syntax-highlighting (commands turn red when they're wrong, before I press Enter), z for jumping to frequent directories, sudo (press Esc twice to prefix the last command with sudo), and git.
The prompt is starship: fast, written in Rust, and it shows only what's relevant: the directory, Git branch and status, and the language or environment I'm in.
Then come the command-line tools that quietly replaced the classics:
| Tool | Replaces | Why I like it |
|---|---|---|
lsd |
ls |
icons, colours, directories first; lsd --tree as tree |
bat |
cat |
syntax highlighting and line numbers |
ripgrep (rg) |
grep -r |
extremely fast, respects .gitignore |
fd |
find |
simpler syntax, also fast |
fzf |
scrolling and guessing | fuzzy finder for files, history and directories |
lazygit |
typing git commands | a full Git UI in the terminal |
git-delta |
plain diffs | readable, syntax-highlighted diffs |
tldr |
man (sometimes) |
practical examples instead of manuals |
gh |
the GitHub website | PRs, issues and repos from the terminal |
fzf deserves a special mention. With its zsh integration, Ctrl-R becomes a fuzzy search over my entire command history, and Ctrl-T fuzzy-finds files. I also use fzf-git, which adds fuzzy pickers for branches, commits and files in Git repos, and I've set fzf to preview directories as an lsd tree when completing cd. It's one of those tools you stop noticing because it's simply how the terminal works now.
A few aliases that save me hundreds of keystrokes a day:
alias v='nvim'
alias cat='bat'
alias ls='lsd'
alias ll='lsd -alF --group-directories-first'
alias tree='lsd --tree'
alias gis='git status'
alias gic='gitmoji -c'          # commit with an emoji, because life is short
alias gu='open "$(git config --get remote.origin.url)"'   # open the repo in the browser
alias w='curl wttr.in/StJohns'  # Newfoundland weather check, essential
tmux: sessions that survive
Inside iTerm2, I run tmux with the catppuccin (mocha) theme. Its status bar shows the session, directory, CPU and battery. Two plugins make it indispensable: tmux-resurrect saves my panes and windows, and tmux-continuum saves and restores them automatically. I can reboot the machine and my sessions, windows and panes come back exactly as they were. Mouse support is on, because I'm a terminal person, not a purist.
The editor: Neovim
Why Neovim instead of classic Vim? Three reasons:
- Lua configuration. Lua is a real programming language with sensible syntax. Vimscript is... an experience.
- Built-in LSP. Neovim talks to language servers natively, so you get go-to-definition, rename, diagnostics and autocompletion the same way VS Code does.
- Treesitter. Syntax highlighting based on actually parsing your code, not regular expressions. It's more accurate, and it enables smarter text objects and folding.
Plain Vim still matters, though: it's on practically every server. SSH into a machine, type vim, and the muscle memory works the same. That's the real superpower of learning Vim: the keystrokes travel with you, even when your config doesn't.
The framework: NvChad
Instead of building a config from scratch, I start from NvChad, a Neovim configuration framework that's fast, good-looking and well maintained. Installing it is one command:
git clone https://github.com/NvChad/starter ~/.config/nvim && nvimOpen Neovim, wait a moment while plugins install, and you get:
- lazy.nvim managing plugins, loading them only when needed, so startup stays fast
- Telescope for fuzzy-finding files, text across the project, recent files and more
- nvim-tree as a file explorer
- Treesitter for highlighting
- nvim-cmp with snippets (LuaSnip and a big library of friendly snippets) for autocompletion
- Mason to install language servers, formatters and linters from inside the editor
- gitsigns showing added, changed and deleted lines in the gutter
- which-key, which pops up a menu of available shortcuts when you pause after pressing a key
- a polished statusline, tabline and theme system
The beauty of the starter template is that NvChad itself stays a plugin. Updates don't overwrite my changes, because my changes live in my own small files.
My customisations (all of them)
Leader key: Space. The leader is the prefix for your own shortcuts. Space is the biggest key on the keyboard and your thumbs are always on it.
vim.g.mapleader = " "Theme: onedark. Easy on the eyes for long sessions, and it matches the dark terminal I use everywhere else. NvChad has dozens of themes; <leader>th opens a picker with live preview.
M.base46 = {
  theme = "onedark",
}
Two mappings that changed my life.
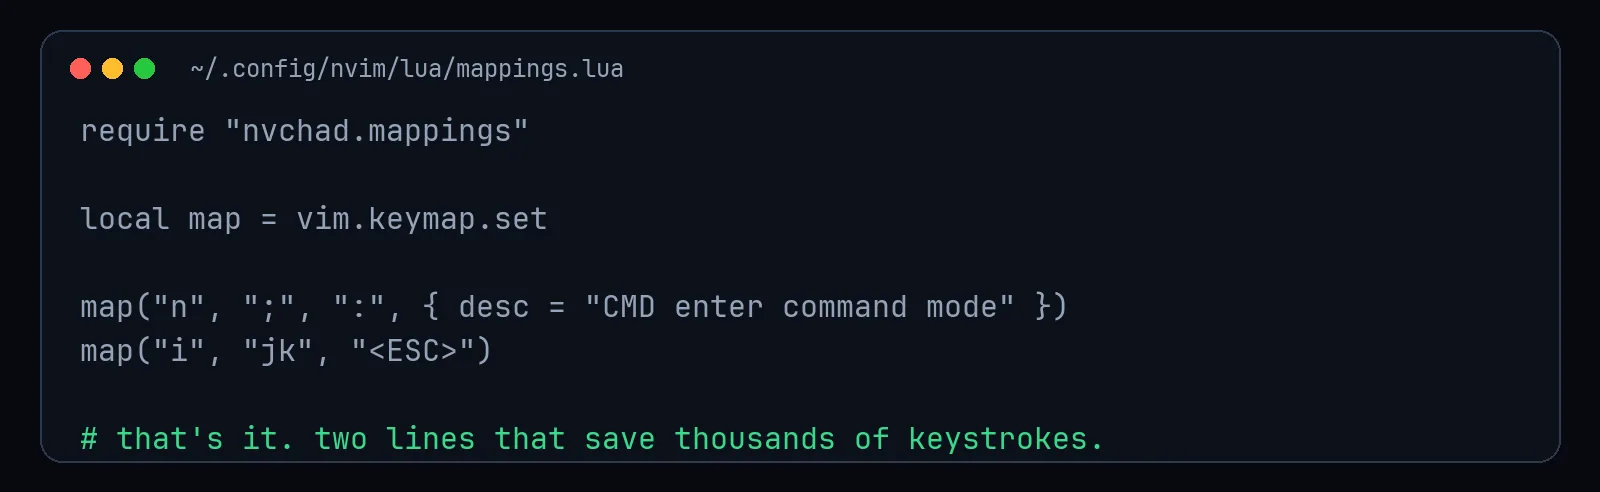
;enters command mode. In normal Vim,:needs Shift. You type it hundreds of times a day. Mapping it to;saves a shocking number of keystrokes and pinky stretches.jkin insert mode means Escape. The Escape key is far away in the corner of the keyboard.jkis right under your fingers, and you'll almost never type those two letters in that order in normal text.
That's it. Two lines. It's tempting to add dozens of custom mappings, but these two are the ones that earn their place every single day.
Language servers. I enable the HTML and CSS servers, since I tinker with websites (like this one) a lot. Adding more is a one-liner, and Mason installs the servers for me:
local servers = { "html", "cssls" }
vim.lsp.enable(servers)
Type :Mason, find the server you need (for Python, pyright), press i to install it, then add its LSP name to the list. Done.
Formatting with conform.nvim. Lua files get formatted with stylua. I trigger formatting manually with <leader>fm rather than on every save, because sometimes I'm editing someone else's file and don't want to reformat the whole thing in my pull request.
The keys I use all day
These are mostly NvChad defaults, with Space as the leader:
| Keys | What it does |
|---|---|
<leader>ff |
find files (Telescope) |
<leader>fw |
live grep: search text across the project |
<leader>fb |
switch between open buffers |
<C-n> |
toggle the file tree |
<leader>/ |
comment / uncomment a line |
<leader>fm |
format the file |
gd |
go to definition |
K |
show documentation for the thing under the cursor |
<leader>th |
change theme |
; / jk |
my two mappings: command mode / escape |
And the Vim fundamentals that make everything else fast: ciw (change inner word), dap (delete a paragraph), . (repeat the last change), * (search for the word under the cursor), % (jump between matching brackets), and macros with q. No plugin beats knowing these.
How it all fits together
For example: alt-t brings up iTerm on workspace 1, tmux restores the project session, z drops me into the repo, v . opens Neovim, <leader>ff finds the file, and alt-l jumps to the browser on the right to check the docs. My hands never leave the home row, and the same h j k l instinct works at every level: windows, panes and text.
Why this approach works for me
- Small surface area. If something breaks, there are only a handful of files to look at.
- Fast. Plugins load lazily; Neovim opens instantly.
- Portable. My config lives in
~/.config/nvimas a Git repo. A new machine needs Neovim, a Nerd Font and onegit clone. - Up to date without effort.
:Lazyupdates plugins; NvChad updates itself;lazy-lock.jsonpins exact versions so nothing changes until I decide.
If you want to start
- Learn Vim motions first. Run
vimtutorin your terminal; it takes about 30 minutes and teaches the essentials. - Install a Nerd Font and set it in your terminal.
- Install Neovim (
brew install neovimon macOS) and clone the NvChad starter. - Use it for real work for two weeks before customising anything. Then add only what you genuinely miss.
- Want the rest of the desk?
brew install --cask nikitabobko/tap/aerospace,brew install asmvik/formulae/skhd felixkratz/formulae/borders, thenbrew install fzf bat lsd ripgrep fd lazygit git-delta starship tmux, and add tools one at a time, as you feel the need.
My old config was impressive. My current config is useful. It took me far too long to realise those aren't the same thing.